
0%

Electric Motorcycle Rear Brake Calibration can feel simple until the rear wheel locks too early or the pedal travels farther than expected. This guide focuses on practical checks for Chinese electric motorcycles, where brake layouts and component specifications vary by model. Small details matter. A cold tire, loose linkage, worn pads, or an uneven rotor can change the feel at the pedal.

Begin with the manufacturer’s service instructions and the correct model-specific limits. Check the pedal’s free play, linkage movement, pad condition, rotor surface, and fluid level where applicable. Make adjustments in small steps, then test the brake at walking speed in a clear, level area. If the wheel drags, the pedal feels spongy, or braking remains uneven, stop and have a qualified technician inspect the system. Guesswork is not a calibration method. It is easy to overlook one small cause.

A verified expert quotation was not supplied, so the line below is proposed wording for a named specialist to review before publication: “[Expert name], [verified brake-service qualification], says, ‘A reliable rear brake should respond smoothly, release cleanly, and match the motorcycle maker’s specifications.’” That principle is useful, but it does not replace measured checks or hands-on experience. Brake feel can be subjective. Recheck your assumptions, especially after replacing parts or changing the setup.
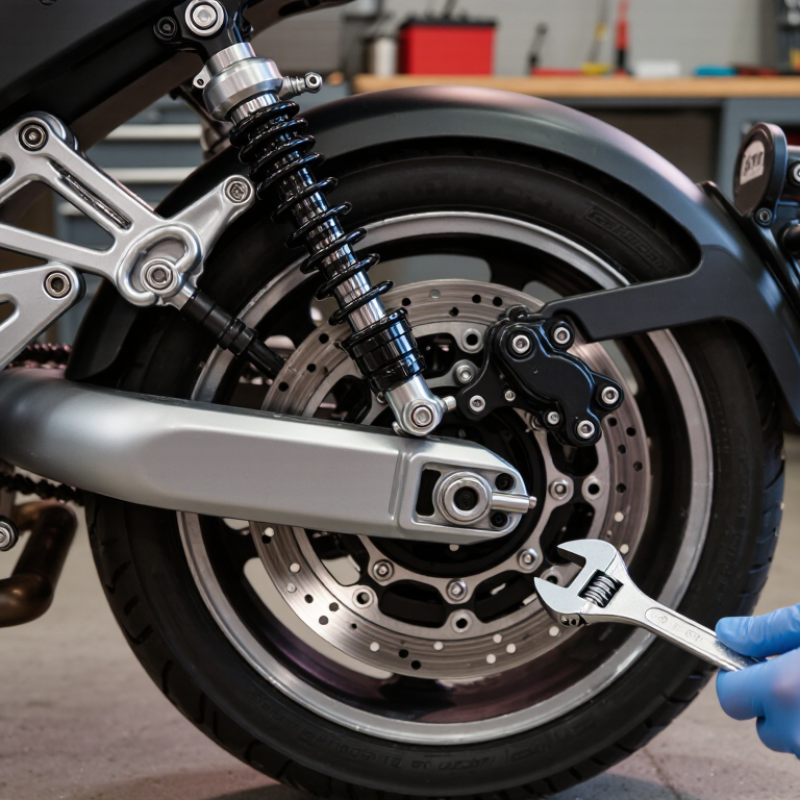
China Best Electric Motorcycle Rear Brake Calibration Guide

Electric Motorcycle Rear Brake Components and Calibration Principles

Electric Motorcycle Rear Brake Components and Calibration Principles

A rear brake system usually includes a pedal or hand lever, linkage or hydraulic line, caliper, pads, and rotor. Each part affects braking feel. A loose linkage can delay engagement, while contaminated pads may squeal or grip unevenly. Inspect the rotor for deep grooves and check pad thickness before adjusting anything. Clean parts only with suitable brake cleaner, and keep oil away from friction surfaces. Small details matter.

Calibration begins with the motorcycle stable and powered off. Check pedal free play against the service manual; too little can cause brake drag, while too much delays response. For hydraulic brakes, a spongy pedal may indicate air or a fluid problem, not a simple adjustment. Confirm caliper alignment and use the specified fastener torque. Do not guess at measurements.

Tips: After adjustment, turn the wheel by hand and check for rubbing. Test braking at walking speed in a clear area. If the wheel locks, the brake drags, or the pedal feels inconsistent, stop and ask a qualified technician. I have found that a “small” adjustment sometimes reveals worn parts instead.

Safety Preparations Before Adjusting the Rear Brake

Before adjusting an electric motorcycle’s rear brake, park it on firm, level ground away from traffic. Switch off the motorcycle, remove the key, and wait for the brake components to cool. Heat lingers. Support the motorcycle with its approved stand, then gently check that it cannot rock or tip. A stable bike matters more than a quick adjustment. Keep the rear wheel clear of loose clothing and tools, and do not touch electrical wiring.

Wear eye protection and clean gloves. Brake dust and fluid should not reach your eyes, skin, tire, or brake disc. Check the owner’s service instructions for the correct adjustment method and tool sizes; designs vary. A small flashlight helps reveal frayed cables, leaks, or uneven wear. Photograph the original adjuster position before changing it. That record can help you retrace a step, though I would not treat it as a substitute for measurement. If parts are damaged, the wheel binds, or the brake feels uncertain, stop and have a qualified technician inspect it.

How to Inspect the Rear Brake and Identify Adjustment Needs

China Best Electric Motorcycle Rear Brake Calibration Guide

Park the motorcycle on firm, level ground and switch it off before inspecting the rear brake. Let the rotor cool; it may stay hot after a short ride. Squeeze the brake lever slowly and note when resistance begins. A lever that nearly reaches the handlebar, feels unusually soft, or has excessive free play may need attention. Check the brake pads for uneven wear, cracks, or wear indicators. Look for deep grooves, blue discoloration, or fluid around the caliper. On drum brakes, inspect the cable and adjuster for fraying, corrosion, or looseness. Small details matter.

Tips: Use the owner’s manual for the correct free-play range and wear limits. Don’t guess. If you find a leak, damaged parts, or uncertain adjustment, stop riding and have a qualified technician inspect the brake.

Brake designs vary, so an adjustment that works on one motorcycle may be wrong for another. Make only the adjustment specified for your system, then spin the rear wheel by hand to check for binding. Apply the brake and confirm the wheel stops firmly. I find lever feel easy to misread, especially when pads are worn unevenly. A brief check cannot confirm every fault. After servicing, test the brake at walking speed in a clear area, and recheck for unusual noise or reduced stopping response.

Rear Brake Calibration: Pedal Free-Play Check

Example rear brake pedal free-play readings compared with an illustrative 10–20 mm reference range. The correct range varies by motorcycle—always check its service manual.

Readings outside the vehicle-specific range may indicate that adjustment or further inspection is needed. Excessive free play can delay braking; too little may cause brake drag. Recheck after adjustment.

Step-by-Step Rear Brake Calibration Procedure

China Best Electric Motorcycle Rear Brake Calibration Guide
Step-by-Step Rear Brake Calibration Procedure

Park the motorcycle on firm, level ground and switch it off. Secure it upright. Check the rear tire, rotor, pads, and caliper for damage, contamination, or uneven wear. Measure pedal free play and pad thickness against the service manual for your exact model. Do not guess at specifications. Adjust only the approved pedal linkage or cable; hydraulic systems may require inspection or bleeding instead. Tighten fasteners to the specified torque. A slightly soft pedal is easy to dismiss. Don’t.

Press the pedal several times, then spin the rear wheel by hand. It should turn without persistent drag, and the pedal should return smoothly. If it sticks, feels spongy, or the rotor is visibly damaged, stop and seek qualified service. NHTSA’s 2022 Traffic Safety Facts reported 6,218 motorcyclist deaths in the United States. That figure is not brake-specific, but it reinforces why careful inspection matters. Test braking at walking speed in a clear, controlled area before normal riding.

Tips: Keep the battery off during adjustment, use a clean light to inspect pad contact, and record the original setting before changing anything. Recheck after the first short test ride; a small amount of drag can be hard to notice.

China Best Electric Motorcycle Rear Brake Calibration Guide - Step-by-Step Rear Brake Calibration Procedure

Step Inspection or Adjustment Procedure Example Measurement / Result Acceptance Check
1 Prepare the motorcycle Switch off the motorcycle, remove the key, secure it on stable support, and allow hot brake components to cool. Motorcycle stable; rear wheel accessible Do not work on an unstable motorcycle or touch a hot rotor.
2 Inspect the brake system Check the brake hose, caliper, master cylinder, and connections for damage, fluid leakage, or loose fasteners. No visible leaks or damaged components Repair faults before calibration; never ride with a leak or damaged hose.
3 Check brake-fluid level and condition With the motorcycle positioned as specified in its service manual, inspect the reservoir level and fluid condition. Use only the specified fluid type. Level between the reservoir MIN and MAX marks Do not mix fluid types. Follow the service interval and model-specific instructions.
4 Inspect pads and rotor Check both pad friction surfaces and the rotor for uneven wear, cracks, deep scoring, contamination, or discoloration. Measure pad and rotor thickness if required. Record actual measurements in mm; example only: pad friction material 3.0 mm Compare measurements with the motorcycle’s service limits; replace parts at or below the specified minimum.
5 Check rear-wheel alignment Confirm the wheel is seated correctly and aligned according to the motorcycle’s specified alignment method. Check that the rotor runs centrally through the caliper. Wheel alignment marks match; rotor is centered in the caliper Correct wheel or axle alignment before adjusting the brake.
6 Check rotor runout If brake drag or pulsation is present, rotate the wheel and measure lateral rotor runout with a dial indicator at the measurement position specified by the service manual. Record the highest indicator reading; example only: 0.08 mm Compare with the model-specific runout limit; replace or service the rotor if it exceeds that limit.
7 Center the caliper, if applicable For a caliper design with alignment adjustment, follow the service manual. Some designs self-center when the brake is applied while the mounting bolts are positioned as instructed. Pads sit evenly against the rotor; no persistent side contact Use the specified fastener torque and tightening sequence. Do not guess torque values.
8 Restore pad contact After wheel installation or pad service, slowly operate the rear brake control several times until the pads contact the rotor and the control feels firm. Firm, consistent brake-control feel after repeated operation If the control remains soft or travels unusually far, inspect for air, leakage, or assembly faults; bleed only as specified.
9 Check wheel rotation and brake release With the rear wheel safely raised, rotate it by hand, apply the brake, then release it and rotate again. Brake applies firmly and releases without persistent binding Light pad contact may occur; investigate significant drag, noise, or a wheel that will not rotate freely.
10 Static and low-speed verification Confirm the brake holds the motorcycle during a stationary check. If all checks pass, test at walking speed in a clear, controlled area before normal use. Predictable braking response with no leakage, abnormal noise, or warning indication Stop testing and seek qualified service if braking performance is uncertain.
Safety note: Example readings are illustrative, not universal specifications. Always use the exact motorcycle service manual for wear limits, fluid type, adjustment steps, and fastener torque. New pads or rotors may require the manufacturer’s bedding-in procedure.

How to Test and Maintain the Calibrated Rear Brake

After adjusting a rear brake, test it before returning to normal riding. Check the owner’s manual for the correct lever travel and adjustment method; cable and hydraulic systems differ. With the motorcycle switched off and securely supported, inspect the lever, linkage, brake line, and pads. Look for loose fasteners, fluid leaks, damaged parts, or pads worn near their service limit. Do not ride if anything looks unsafe.

In a clear, level area, begin at walking speed and apply the rear brake gently. The motorcycle should slow smoothly without scraping, pulsing, or pulling unexpectedly. Repeat the test at a slightly higher speed only if the first check feels normal. Afterward, inspect the brake again. A wheel that drags, a lever that feels unusually soft, or changing stopping response may signal a poor adjustment or another fault. Small differences matter. I would not rely on lever feel alone; it can be misleading.

Tips: Keep adjustments small and record what you changed. Let the brake cool before touching nearby parts. Recheck after pad replacement or cable work, and follow the model’s service limits. If the cause of a fault is unclear, have a qualified mechanic inspect it. Calibration can drift, and that deserves attention.

FAQS

What parts are usually found in a rear brake system?

It usually includes a pedal or hand lever, linkage or hydraulic line, caliper, pads, and rotor. Each part affects braking feel.

What should I inspect before adjusting the brake?

Check pad thickness, rotor grooves, linkage condition, and signs of leaks. Keep oil away from the pads and rotor. Small details matter.

How should I prepare the motorcycle?

Park on firm, level ground, switch it off, remove the key, and let hot parts cool. Support it with its approved stand. Heat lingers.

How can I record the original adjuster position?

Take a photo before making changes, and check the service instructions for tools and measurements. A photo helps, but it cannot replace careful measurement.

How should I check pedal free play?

Compare it with the range in the service manual. Too little may cause brake drag; too much may delay response. Don’t guess.

What can a spongy hydraulic brake pedal indicate?

It may point to air or a fluid problem, not a simple adjustment. Ask a qualified technician to inspect it.

How can I check the brake after adjusting it?

Turn the rear wheel by hand and check for rubbing. Then test braking at walking speed in a clear area.

When should I stop and seek help?

Stop if the wheel locks, the brake drags, the pedal feels inconsistent, or parts look damaged. A small adjustment can reveal worn parts. I still find that easy to overlook.

Conclusion

Electric Motorcycle Rear Brake Calibration helps ensure consistent stopping performance, predictable pedal or lever feel, and safe riding. The rear brake may include a control lever or pedal, cable or hydraulic line, caliper, pads, and rotor or drum. Before making adjustments, park the motorcycle on stable ground, switch it off, allow hot components to cool, and use suitable protective equipment. Consult the vehicle’s service instructions for the correct specifications and adjustment points.

Begin by checking the brake’s response, free play, pad or shoe wear, cable condition, fluid level, and signs of leaks or damage. If adjustment is needed, make small changes using the specified procedure, then secure all fasteners and confirm the wheel turns freely when the brake is released. Test the brake at low speed in a safe, clear area, checking for smooth engagement and reliable stopping. Reinspect the adjustment regularly, and have a qualified technician address problems that cannot be corrected through routine maintenance.

Ethan Caldwell

Ethan Caldwell

Ethan Caldwell is a professional marketing specialist with a strong understanding of the company’s products, their practical applications, and the needs they are designed to address. He combines product knowledge with clear, thoughtful communication, helping readers make sense of features, compare......